
Wondering how to store all of your serving and entertaining pieces? I have the DIY! Here’s how to turn a tool chest into a Butler’s pantry.

There’s something to be said about a scattered collection. The beauty about collecting is to group it together and display it in a way that doesn’t look jumbled. Try as I might to keep my collection of plates and tableware together so I can see what I have – grab and go – it was my flatware, silver and serving pieces that were tucked away in various drawers and spots. I’m embarrassed to admit that I had an asparagus server stowed in the drawer with my socks. Yes, I know, even MY eyes are rolling.
I needed a hard working storage solution to keep my collection of flatware and serving pieces together in one spot. My mom kept all of hers in a piece from Bombay Company that she had for as long as I can remember. I wanted something like this, and set out to find it. Then, I stumbled across a genius idea that I found in Eddie Ross’s book, Modern Mix that was right up my alley; a repurposed tool chest.

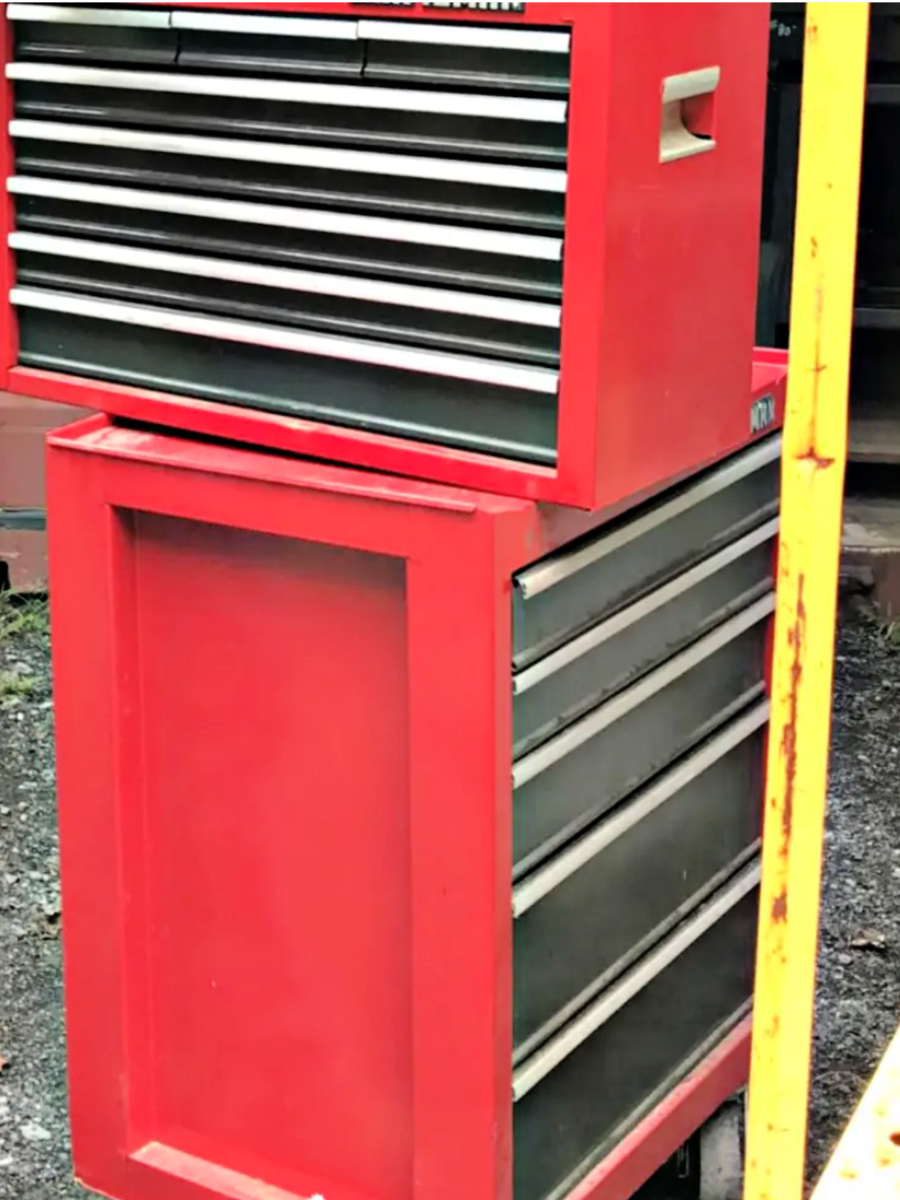
Brand new, these things aren’t cheap, so I turned to flea markets and Facebook Marketplace, where I always find my thrills. Though these tool chests are readily available, I needed to find the Goldilocks of them all – not too rusty, plenty of drawers for storage, and it had to be mobile. The chest needed to have wheels that worked, and above everything else, it had to be affordable and in the price range I had budgeted.

After searching a couple months at least, I found exactly what I was looking for on Facebook Marketplace – no surprise there. A salvage yard owner that I’ve purchased a few things from in the past had listed this one. Located in the lot of this eclectic collector’s stuff, tucked behind an aluminum phone booth with a naked mannequin making a call was this tool chest. It was just right, very little rust, an easy clean up and where a coat of paint would do wonders.
How To Turn A Tool Chest Into A Butler’s Pantry
My plan was to clean up the tool chest, and spray paint it white. But first, I had to figure out how to remove the drawers. They were to remain black and rather than spend hours taping them and risking paint dripped in the drawers causing them to stick, they had to be removed.
I searched the internet for answers. Watched video after video on YouTube how to remove them, but all attempts ended up epic fails. Go figure that the last video I watched was the winning video. I followed the instructions and the drawers popped out. So, naturally, I filmed my own video for you to watch, which has now become one of my highest watched YouTube videos to day.
How To Remove Drawers From A Craftsman Tool Chest

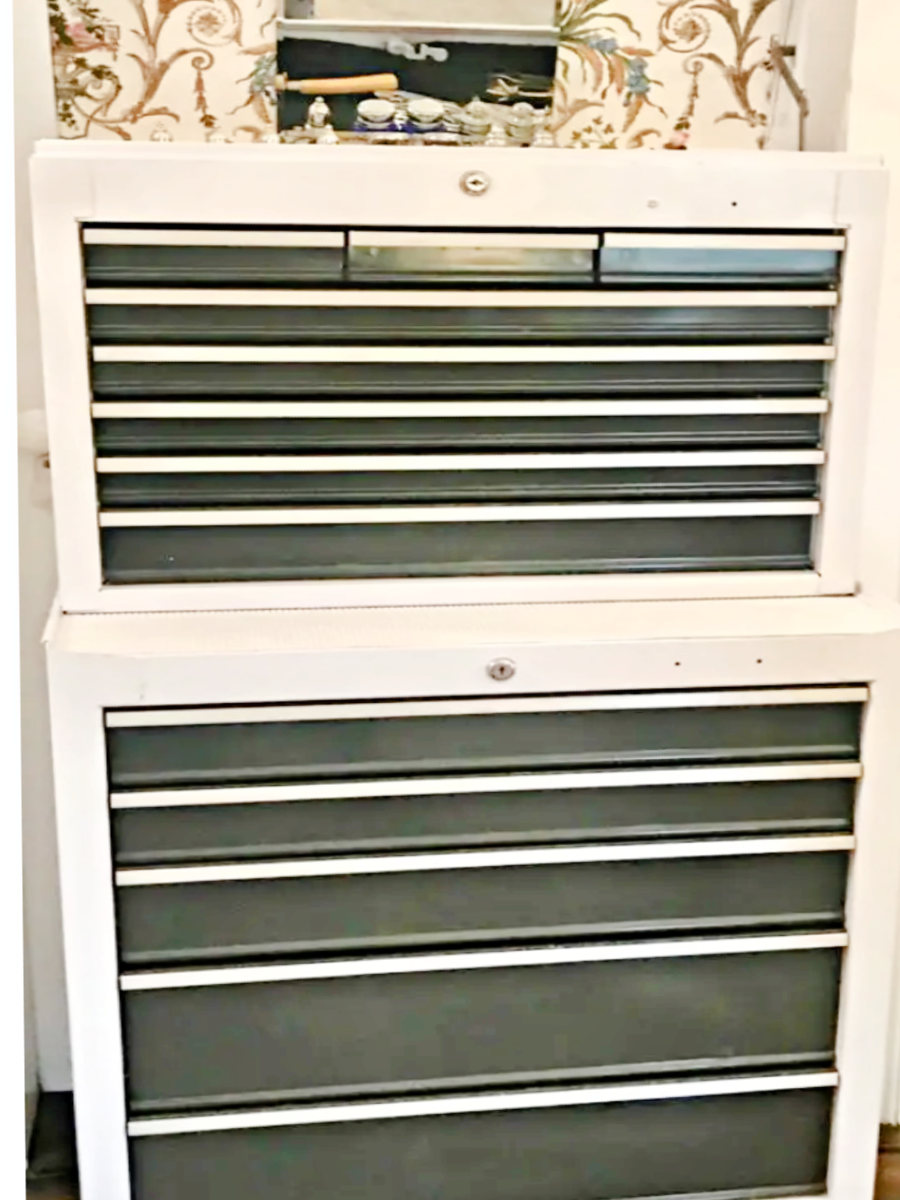
For a clean look I stayed with my idea of spray painting the tool chest white. Then came the next step of lining the drawers. I lined each drawer, the bottom and the sides, with anti tarnish fabric to protect the glass, silver and other finishes. You can also use felt, but the anti tarnish fabric is a little insurance policy to help keep your silver shiny longer. You can buy the anti tarnish fabric HERE.
Making It Fancy
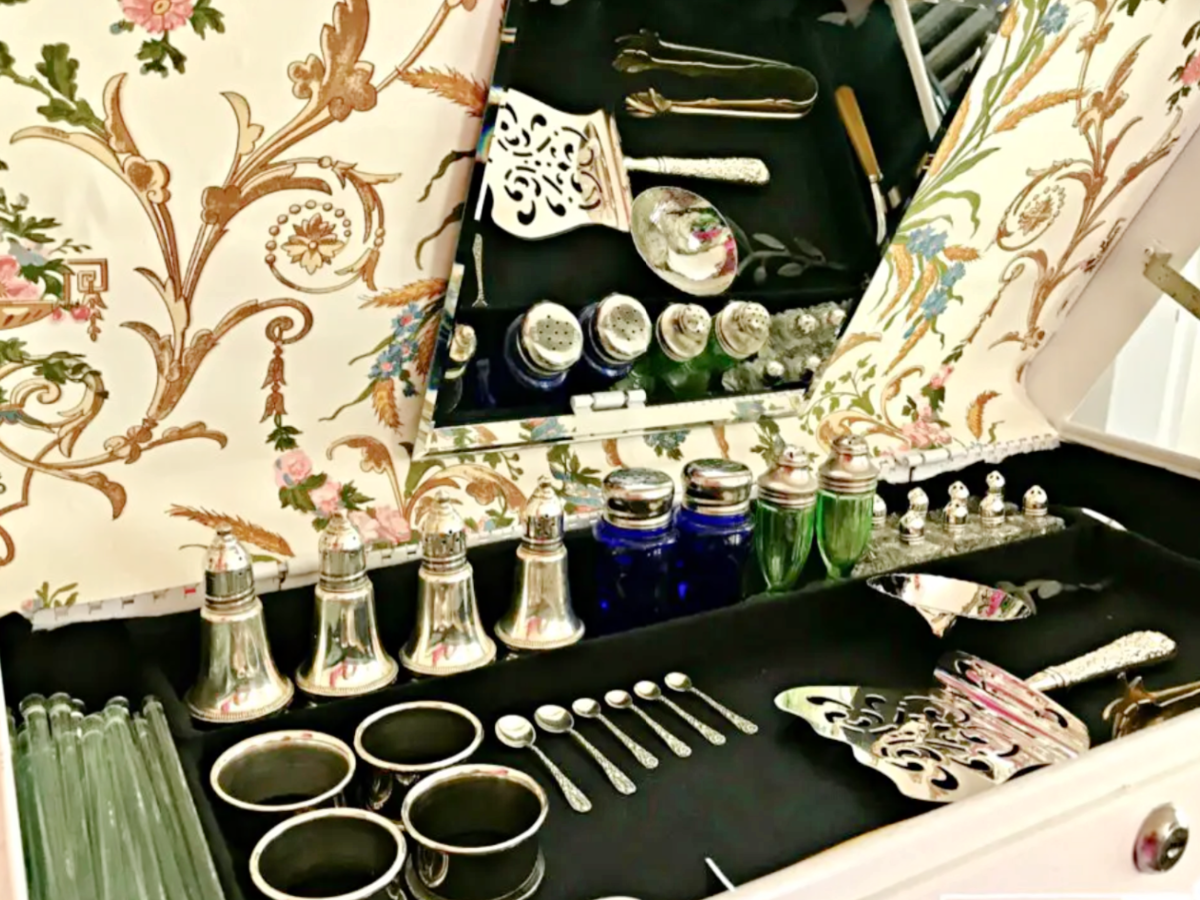
For a little whimsy and fanciness, I lined the inside top shelf with a leftover scrap of wallpaper, pasting it with this decoupage glue, and attached a small mirror with velcro.
And when I thought it was done, I stepped back and took a look. When all of the drawers were closed, it just looked like a white tool chest. It didn’t look like a special piece at all. It needed a finishing touch.
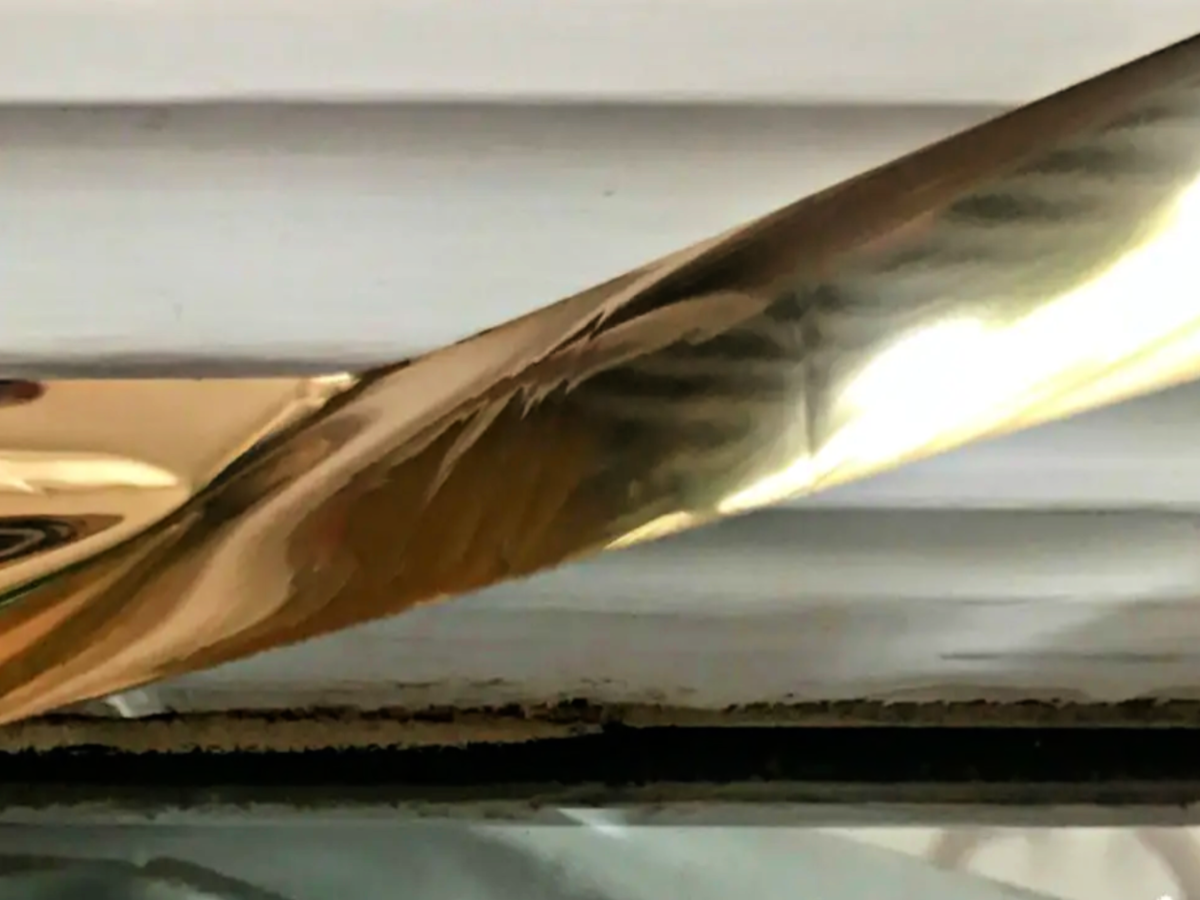
Have you heard of brass tape? Well, I love the stuff and could easily jazz up just about anything I let my eyes rest on. Super easy to apply, I applied it to the handles of every drawer, covering up the scratched and bland silver color. Now, the tool chest became a portable Butler’s pantry. You can find the brass tape HERE!

I have filled the cart with my collection of flatware and serving pieces that I use the most. Now, I don’t have to go searching the sock drawer for that one specific serving piece. Finding smart and hard working storage solutions is the key to making things easier on you, and too, while you’re entertaining.

Just because something is designed for one purpose doesn’t mean it can’t be used for another. Always keep this in mind.
And use brass tape whenever possible. 😉
This post contains affiliate links. I do receive a very small commission at zero cost to you. As always, thank you so much for your support.


